

 Aim:
Aim:


A supporter (supportasse, underpropper) for a woman's large ruff of c. 1600.
We - being William de Wyke and Katherina Weyssin - produced a functional, pretty supportasse, to go with Katherina's new gown and ruff, but we still have some questions about the construction. We'd like to do another at some point.
Sources of information:
(Katherina Weyssin)
Summary
We have extant supporters - but they're a generation later and a different shape to those of the period we're interested in. We have images - but they're not clear enough to see construction details. We have text - but it provides only corroborating evidence, not a clear recipe.
So we've made a supporter using the construction-techniques of the 17th century models and the shape of the 16th century images.
Extant examples (1st quarter 17th century)
There are excellent photographs and descriptions of a number of extant wire supporters from the first quarter of the 17th century in Janet Arnold's Patterns of Fashion 4: the cut and construction of linen shirts, smocks, neckwear, headwear and accessories for men and women, c.1540-1660 (Macmillan, 2008).
Wire supporters feature on pages 10, 34-9 and 91-5.
There are images online of some of these:
- Fleur-de-lys pattern supporter at the Metropolitan Museum of Art
These items are our main source for construction techniques, although they are universally about a generation later than the fashion we're interested in, and in a semi-circular rather than a circular shape.
We have detailed information about only one circular supporter - a silver-filigree construction with hinges! It's still from the early 17th rather than the late 16thC.
Images showing ruff with supportasse (from 1580-1600 )
We don't know of any extant supporters from this period, but images of people wearing large ruffs, which became fashionable from the 1580s, often clearly show that a supporter is worn. However, we didn't see enough detail to be sure of the construction, so we're guessing that it was similar to that used in the early 17th C.
- Images from Negri's dance manual of 1600, Le Gratie d'Amore. The women in Negri's images are mostly wearing large ruffs with large, circular supporters clearly visible.
Clear images of supporters are rather rare in portraits, but we found a few:
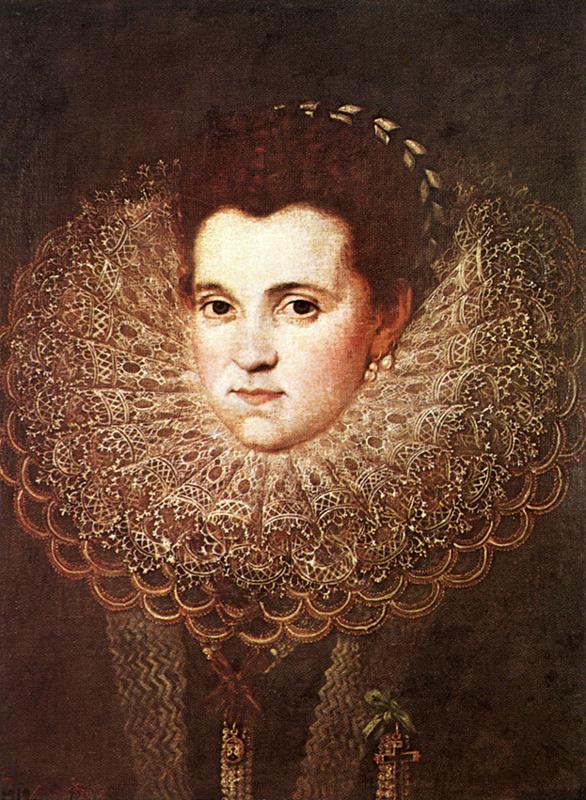
- A portrait of a woman (probably early 17th C), by Pantoja de la Cruz, from the Web Gallery of Art.
We have since found a large number of late-16th and early-17th century portraits of Spanish princesses wearing large circular supportasses very like those in the images in Negri's book (in a book, alas, not online). An unexpected detail was that many had a row of hundreds of tiny, elongated (leaf- or drop-shaped?) spangles hanging from the outer edge.
As Milan was under the control of Spain at the time Negri wrote his treatise, it's not surprising that the engravings show clothing heavily influenced by Spanish fashions.
Text descriptions of supporters (e.g. Stubbes, Anatomie of Abuses, 1583)
We get supporting evidence for the idea that 16th C supporters could be similar in construction to the surviving early 17th-century examples, from the way they are described by Stubbes.
Concerning supporters for men's large ruffs (the first "pillar" to support them being starch):
The other piller is a certain device made of wyers, crested for the purpose, whipped over either with gold, thred, silver or silk, and this hee calleth a supportasse, or underpropper. This is to be applyed round about their necks under the ruffe, upon the out side of the band, to beare up the whole frame and body of the ruffe from falling and hanging down . . .
And women's:
. . . and so applyed to their goodly necks, and, withall, underpropped with supportasses (as I tolde you before) the stately arches of pride: . .
Construction
(William de Wyke)
Overview
Absent any evidence to show how supportasse were constructed in the late 16th century the goal was to end up with a plausible and good looking finished article, working out whatever construction techniques worked to get there as we went along.
Wires in the extant articles documented in Patterns of Fashion 4 are described as tinned, gilt, or silver gilt iron wire. The main source for our supportasse is a 1610-1620 example, T.2062, from the Germanisches Nationalmuseum, Nuremburg documented on pages 91 & 92 of Patterns of Fashion 4. The construction of the original is described as "The struts are of iron, bound with sea-green sleve silk. Twisted round this is a thin silver-gilt strip, so that the struts have a striped effect. The strust are bound together at the intersections with fine silver-gilt wire." The wire of the decorative pieces is "slightly under" 1.5mm and the wire of the outer shapes and main struts is 1.5mm.
Unable to find wrought and drawn iron wire, and lacking the equipment to tin or gild it we used copper plated mild steel welding wire. The main structural pieces are 1.6mm TIG wire and the decorative elements are 0.8mm MIG wire, so the main structure is very slightly thicker, and the decorative elements some 30% thinner, than the wire in the extant example. The supportasse would have looked better with the decorative shapes in heavier wire, but the 1.6mm TIG wire proved too difficult to bend.
The whole thing is wired together with 24AWG copper wire from solid core cat-5 Ethernet cable. We tried jewellery wire but it was too soft and not strong enough to hold pieces together. The welding wire has enough spring in it that the wire holding the structure together has to be reasonably strong and stiff to maintain the shape. With softer wire in the main structure it should be possible to use thinner or softer wire to bind it all together, which would make the construction considerably easier.
Main Structure
The shape of the early 17th century rebato we took the decorative elements has a straight front and decorative scallops around the circumference. The supportasse we were making was of a circular shape to match the 16th century depictions and without a decorated edge.
The main structure of the supportasse consists of four concentric rings of heavier guage wire which come together at an opening at the front which allows the supportasse to be opened and put around the neck. The innermost rings are held together by the stems of the decorative elements. The outer rings, which are doing most of the supporting work, are connected by another length of the heavy wire bent into a series of approximate semicircles which also serve to frame the flower heads of the decorative parts.
The outside diameter was determined by the ruff, which Katherina had already completed when we started the supportasse. The inside diameter was worked out by taking Katherina's neck measurement, adding a little bit for ease, and trying on test circles of wire. The supportasse is completely rigid, and unlike necks it is circular, so it is a fine line between constrictingly tight and tight enough to stay in place. Allowances also had to be made for the binding that went over the wire on the inside and the pleated inside circumference of the linen cover which add up to a few mm of thickness over the wire.
Decorative Elements
Two decorative components were chosen from our primary example (item 29, page 91 in PoF4), a pomegranite and a cinquefoil flower.


The welding wire being mild steel is rather springier and more resistant to bending than pure iron wire would have been and becuase it was purchased ready-plated it couldn't be annealed and it ended up requiring a jig to bend into shape. Having gone through this process I don't think this is how the originals were done, as noted below the wire in the originals is wrapped with metallic thread, silk, or metal foil ribbon and that wrapping wouldn't survive being bent in a jig the way these were. Based on that, and the fact that the individual elements came out a lot more consistently in this supportasse than is shown in surviving ones, William's suspicion is that the elements of the extant examples were bent by hand using just finger force to shape them. This was almost possible with the 0.8mm wire we used but not quite.
Shaping the Wire
The wire for both the decorations and the main structure was shaped on a peg board made from a piece of 20mm thick MDF. The jig for the main circular frame was made by taping a drawing of the frame design to the board and hammering nails in for the wire to be bent around. The wire was pre-bent a bit and the final shaping was done on the board and held in its final shape, under slight tension, by the binding wires. Softer wire or a rolling mill would make it possible to bend the circle more precisely to shape without it being under tension.

The cinquefoils were the easiest shape to form. The jig consists of a piece of dowel slightly tapered on one end and hammered into a hole in the board. A nail was driven into the board almost touching the dowel. The wire was trapped inbetween the nail and dowel, bent around the dowel tightly, passed between the nail and dowel again and bent in the opposite direction around the nail to form the tight curve.

The jig for the pomegranites took several iterations to get right and was fiddly to use in the end, but it worked. The pins are various random nails and bits of hardware I had lying around. The large posts are around 10mm in diameter and are screwed into threaded inserts used in flat pack furniture. The trick with the pomegranite pattern was not to try and shape the whole thing on the board, which I had initially tried to do, but to shape the arms straight and curve them up into their final shape afterwards. The jig is upside down in this picture.


Overall, the shaping was much harder than it needed to be because of the wire we used and William would like to find some more appropriate wire for version 2.
Covering
The supportasse is covered with white linen which started out as a long rectangular strip that was pleated into the circular shape and whip stitched onto the wire frame. There is a small amount of math required to figure out the pleat size based on the inner and outer circumferences of the wire frame but it is not difficult. Subtract the inner circumference from the outer circumference and divide by the number of pleats you want and go from there. The linen was starched and the pleats ironed in before attaching the linen to the wire frame. A narrow strip of lace was sewn to the outside edge of the cover for decoration.


The linen cover is whip stitched to the wire frame. The inside of the frame around the neck is wrapped with cloth tape and the cover is stitched to this. The tape pads the wire slightly and makes the supportasse more comfortable to wear. The inside edge of the cover will be bound with bias tape eventually.


The wire supportasse opens at the front, which necessitates that the very front decoration be made in two halves. A hook and eye holds it closed.

The stiffness of the main structural wires required a lot of binding to hold them in place. This would be much neater with softer wires. The blank space here is where I ran out of time to make the final two pomegranate shapes.

Problems with Copper Coated Wire
The picture above shows how tarnished the copper coating on the wire has become in the months since we made the supportasse. This is an entirely predictable, but at the time unforseen, effect that somewhat detracts from the effect of the supportasse particularly in low light. For future versions I will investigate the costs involved in having plain mild steel wire electroplated with silver or gold. That would also allow the wire to be fully annealed before plating so that the bending in constrution would be easier.
Questions remaining:
Wire wrapping
All of the wires in the extant supportasses are wrapped in coloured silk, metallic thread, or fine strips of metal. Our initial assumption was that the base structure was bent into shape, and the the decorative wrapping was applied, passing a needle or small shuttle through the structure. However, a number of the photographs clearly show that the wrapping passes under the joins, so was applied before the basic structures were assembled. This might make the wrapping process faster (you could partly mechanise it), but it leaves us wondering how you bend the wires into elaborate shapes without disarranging or damaging the silk yarns.